Frequently Asked Questions
We implemented eCommerce MVC in such a way that anyone can configure it depending on their needs.
How to Install Language Pack?
eCommerce MVC supports single and multilingual sites. English and Arabic languages are created on every fresh install. So after setting up the project, you need to install the language packs for these languages. Follow the below steps to install language packs.
- Login with Admin account and goto Admin Dashboard panel.
- Open Languages page from side menu.
- Click on edit for the language you want to install the language pack.
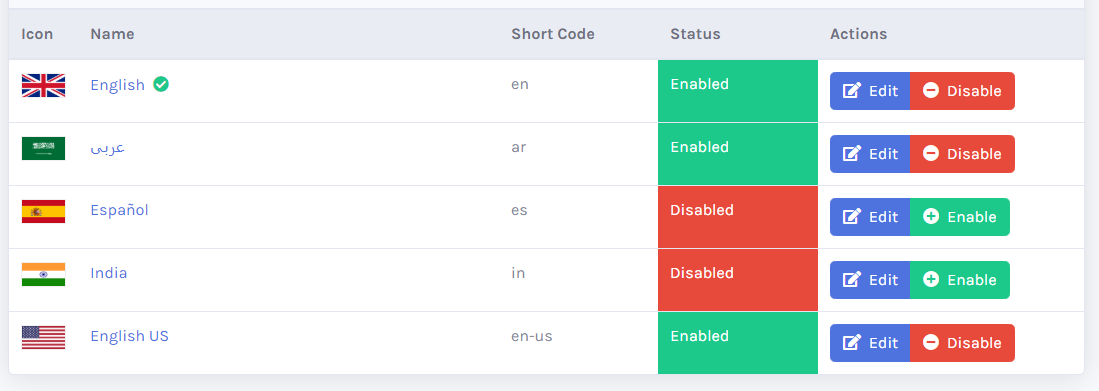
- When language details page is open, go down to Import Resources section, Click on browse and select the language pack file.

- After selecting language pack file, click on import. This will take a few moments to import the language resources.
- Now you can browse the site in the selected language.
How to Create Language Pack in your own language?
As described in above answer, you can easily change language of the site. If you want to use your own language which is not provided in language packs, you will need to create a language pack. Follow the below steps to create your own language pack.
- Open Arabic Language pack file in NotePad++ from Language Packs folder in Project directory which you extracted from the project.
- This language pack file contains a
Languagenode which contain childResourcenode. Each resource node has Key, English and Value attributes. - You need to add the translation according to English Text in your own language to Value attribute. Change all the resources Values in file and then save this file.

- Then follow the steps mentioned in How To install language pack section to install this file.
- Now you can browse the site in the selected language.
How to Change Currency Symbol?
You can easily change which Currency Symbol you want to display along the prices in your site. Just change the value of CurrencySymbol from Configurations page in Admin Dashboard. You can also change how your currency symbol is displayed accross the site. For example you can specify your price format like 12$ or $12 or $ 12. To do this change the value of PriceCurrencyPosition in Configurations. This configuration will set price and currency relation accross the website. {price} will be replaced with the price value and {currency} will be replaced by configured currency symbol.
How to Configure Authorize .Net Payment API Gateway?
eCommerce MVC provides Credit Card payment option. If you set the EnableCreditCardPayment to true in Configurations, you must have to setup your account with Authorize .Net as described in the video and change the related keys in the configurations. You can check the implementation of Authorize .Net payment API in AuthorizeNetHelper class in Helpers folder in eCommerce.Shared module.
AuthorizeNet_SandBox to false so eCommerce MVC can process real transactions. If you need to test Credit Card payments with Authorize .Net Sandbox account on eCommerce MVC, set value of AuthorizeNet_SandBox to true.How to Configure PayPal Payments?
eCommerce MVC also provides PayPal payments option. If you set the EnablePayPalPaymentMethod to true in Configurations, you must have to setup your account with PayPal and change the PayPal ClientID in the configurations.
How to Configure Email Notifications?
eCommerce MVC sends out email notifications when a user creates and account, tries forget password functionality, places an order, when order is updated and to the admin user when a new order has been placed. eCommerce MVC uses Twilio SendGrid API for emails so you need to add SendGrid API Key in Configurations for these emails to work.
SendGridFromEmailAddress and SendGridFromEmailAddressName. Your end users will see emails from this email address in their inboxes.