Setup
Setting up Easyfieds is very simple. After extracting files from zip archive file, you can open project solution file in Visual Studio. We recommend to use Visual Studio 2022 or any up to date versions. Watch the following video for more explanation.
You receive the following files after extracting project compressed file.
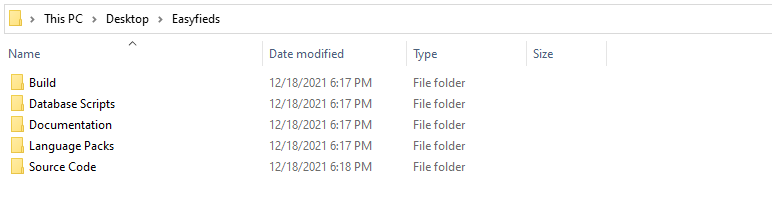
- Build: In this folder you get the build files which you can directly deploy to your server.
- Database Scripts: This folder contains the database related scripts.
- Documentation: As name suggest this contains the documentation files.
- Language Packs: This folder contains language packs for project to be installed.
- Source Code: You get the complete source code file in Visual Studio format in Source Code folder.
Database
Easyfieds uses Entity Framework Code first approach to create database. You don't need any SQL scripts to create database or its tables and columns. You just need change the value of connection string in Web.config file according to to your database server instance. The project will automatically create database tables and seed initially required data with the help of entity framework. Follow below steps to get connection string information and setup your database on different enviroments.
Setting Database on Local Machine
When you are trying to setup Easyfieds in your local/development environemnt.
- Open Command Prompt by pressing Win+R and then type
cmdin run window. Command Prompt will be opened. Get the name of SQL server instances by typingsqllocaldb iin your command prompt.

- Open Easyfieds in Visual Studio.
- Open web.config file from Easyfieds project and search for
AppConnectionStringinconnectionStringstag.

- Change
MSSQLLocalDBwith your preferred server instance name. - Run the project in browser by pressing
Ctrl+F5. It'll take a moment when loading for the first time because Entity Framework is creating database and its entities and seeding the initial data in the background.
Setting Database on Remote/Release
When you are trying to publish Easyfieds with remote database.
- Get the database connection string for your remote database server. You can create a new empty database or choose an existing one.
- Open project in Visual Studio.
- Open web.config file from App.Web project and search for
AppConnectionStringinconnectionStringstag.
- Change connection string value to your database connection string from step 1.
- Publish Easyfieds to your server. We recommend to use Microsoft Azure, Amazon AWS or Godaddy Windows Hosting but you can host it on any windows server.
- Open your published site in the browser. It'll take a moment when loading for the first time because Entity Framework is creating database and its entities and seeding the initial data in the background.
AppConnectionString. This is used to identify connection string in the AppDataContext class.Default Roles and Users
Easyfieds also seed following default role and user data with the help of Entity Framework when database is first created. It is defined in AppDBInitializer class which exists in App.Data project.
- Super Admin
Easyfieds also has a default Adminstrator user with the following credentials.
- Email:
super-admin@site.com - Username:
SuperAdmin - Password:
super-admin123
For website level configurations e.g. Application Name, Currency Symbol, Payment Methods etc check Configurations.